
From Zero to Deployment: How I Created a Scalable Portfolio Website on AWS with Hostinger Domain
In today’s tech-driven world, having a standout portfolio website isn't just a bonus—it’s essential. With the rise of AI tools and competition in every field, I realized it was time for me to build something that would reflect my skills, personality, and projects. So I started my journey, and now, I have my very own portfolio website—hosted with a custom domain and powered by modern web technologies.
In this blog, I’ll guide you step-by-step on:
What tools and technologies I used
How I deployed it on AWS
Folder structure & configuration
How YOU can clone or replicate it with zero prior experience
🌐 My Portfolio:
I purchased the domain from Hostinger and deployed the project using AWS services. Here's everything I used and how I used it.
Link : https://cloudkinshuk.in
An Overview :
If you're not very familiar with programming and don't want to create a separate project from scratch using React and TypeScript, you can directly jump to the “Cloning the Project” section using the navigation menu. This will simplify the setup process and allow you to easily customize the UI, code, and data to fit your needs.
🧠 Tech Stack & Tools
⚙️ Development Environment
IDE: VS Code
Package Manager: npm (primary), bun/yarn/pnpm (optional)
📦 Core Technologies
| Tool | Version |
| React | 19.0.0 |
| TypeScript | 5.7.2 |
| React Router DOM | 7.3.0 |
| Tailwind CSS | 4.0.14 |
| Framer Motion | 12.5.0 |
| React Icons | 5.5.0 |
| Lucide React | 0.482.0 |
🎨 Fonts
- Poppins from Google Fonts
☁️ Deployment & Cloud Setup
🧭 Cloud & Hosting
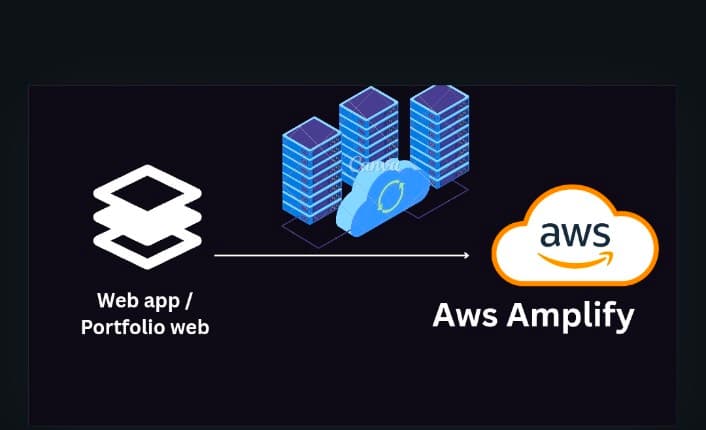
Frontend Hosting: AWS Amplify (Serverless, scalable, easy CI/CD)
DNS & SSL: AWS Route 53
Domain Provider: Hostinger (
.indomain for ₹1000 / 2 years)Version Control: Git & GitHub
🔗 GitHub Repo: kinshukjainn/kinshukkportfolio
Flow Diagram of Architecture :

Beginner-Friendly Alternatives for Deployment
If you’re new to cloud deployments, these platforms are perfect starting points:
Vercel
Netlify
Railway
Heroku
For Intermediate/Advanced Users:
Google Cloud Platform (GCP) — great if you like Google’s ecosystem
Microsoft Azure — ideal for Microsoft fans
Building Process (From Scratch)
💡 Tip: Only use one package manager — npm or bun or yarn or pnpm. Using more than one can cause conflicts during deployment.
Step 1: Create Your React App
Using npm (Recommended for beginners):
npm create vite@latest my-project-name
Using bun:
run this command in your terminal before running bun create vite in your project directory in vscode :
bun install
bun create vite
Using yarn: ( if you know yarn installation well then only use it )
yarn create vite my-project-name
✅ Step 2: Install Project Dependencies
Navigate to your project directory:
cd kinshukkportfolio # your project directory can be different
Then install packages:
npm install
If using yarn or bun:
yarn install
# OR
bun install
📁 Folder Structure
Here’s what my folder structure looks like:
REACTPORTFOLIO/
├── kinshukportfolio/
├── node_modules/
├── public/
├── src/
│   ├── assets/
│   ├── components/
│   ├── socialmedia/
│   ├── App.tsx
│   ├── index.css
│   ├── main.tsx
│   └── vite-env.d.ts
├── .gitignore
├── package.json
├── tailwind.config.js
├── vite.config.ts
├── tsconfig.json
└── README.md
🎨 Tailwind CSS Setup
Install Tailwind CSS:
npm install tailwindcss @tailwindcss/vite
Configure vite.config.ts:
import { defineConfig } from 'vite'
import react from '@vitejs/plugin-react'
import tailwindcss from '@tailwindcss/vite'

export default defineConfig({
  plugins: [react(), tailwindcss()],
})
Add Tailwind Imports in index.css:
@import "tailwindcss";
🔌 Other Dependencies Setup
React Icons
npm install react-icons
Framer Motion
npm install framer-motion
Lucide React (Icon Library)
npm install lucide-react
▶️ Running the App Locally
After everything is set up, run:
npm run dev
You should see your site running at localhost:5173 (or similar).
📜 My package.json (For Reference)
{
  "name": "portweb",
  "private": true,
  "version": "0.0.0",
  "type": "module",
  "scripts": {
    "dev": "vite",
    "build": "tsc -b && vite build",
    "lint": "eslint .",
    "preview": "vite preview"
  },
  "dependencies": {
    "@headlessui/react": "^2.2.0",
    "@mui/icons-material": "^6.4.7",
    "@mui/material": "^6.4.7",
    "@tailwindcss/vite": "^4.0.14",
    "framer-motion": "^12.5.0",
    "lucide-react": "^0.482.0",
    "react": "^19.0.0",
    "react-dom": "^19.0.0",
    "react-icons": "^5.5.0",
    "react-router-dom": "^7.3.0",
    "react-syntax-highlighter": "^15.6.1",
    "tailwindcss": "^4.0.14",
    "uuid": "^11.1.0"
  },
  "devDependencies": {
    "@eslint/js": "^9.21.0",
    "@types/react": "^19.0.12",
    "@types/react-dom": "^19.0.4",
    "@vitejs/plugin-react": "^4.3.4",
    "eslint": "^9.21.0",
    "eslint-plugin-react-hooks": "^5.1.0",
    "eslint-plugin-react-refresh": "^0.4.19",
    "globals": "^15.15.0",
    "typescript": "~5.7.2",
    "typescript-eslint": "^8.24.1",
    "vite": "^6.2.0"
  }
}
🧪 Cloning the Project (For Beginners)
Want to replicate this exact setup? Here’s how:
Create a GitHub account (if you don’t already have one)
Visit my repo: github.com/kinshukjainn/kinshukkportfolio
Click "Fork"
Clone your forked version:
 git clone https://github.com/yourusername/reponame.git
 cd kinshukkportfolio
 npm install
 npm run dev
Here is a video of how to clone a forked repo :
Customize the content, styles, and animations to make it your own!
If you have proceed till here you are very near to deploy your own portfolio website on the cloud and also would be able to host it :
Alright Kinshuk! Here's a step-by-step beginner-friendly guide to help you:
Buy a Domain on Hostinger & Connect It to AWS (Amplify + Route 53)
Part 1: Buying a Domain from Hostinger
Go to Hostinger
Create an account if you don’t have one.
Login to your dashboard.
Buy a Domain
Click on "Domains" in the top navbar.
Search for your desired domain (e.g.,
cloudkinshuk.dev).Click Buy Now and proceed with the payment.
Access Domain Settings
After purchase, go to “Domains” → “Manage”.
You’ll see options like DNS, Nameservers, WHOIS, etc.
Part 2: Set Up an AWS Account
Go to AWS Console
Click "Create an AWS account".
Fill in your name, email, and password.
Add billing info (₹2 might be deducted for card verification).
Sign In to AWS Console
- Go to the AWS Console, sign in as a root user (with your email).
Part 3: Create Route 53 Hosted Zone
Search for “Route 53” in the AWS Console.
On the left panel, go to "Hosted Zones" → Create Hosted Zone
Domain Name: your domain (e.g.,
cloudkinshuk.dev)Type: Public Hosted Zone
Click Create
Note Down the NS Records (Nameservers)
- AWS will generate 4 NS records (like
ns-123.awsdns-xyz.com).
- AWS will generate 4 NS records (like
Part 4: Update Nameservers in Hostinger
Go back to Hostinger > Domains > Manage
Scroll to "Nameservers"
Choose "Use custom nameservers"
Paste the 4 NS records you got from Route 53
ns-1962.awsdns-53.co.uk
ns-897.awsdns-47.net
ns-1136.awsdns-14.org
ns-200.awsdns-25.com
Note: These are just examples and won’t work for your domain. You must use the exact NS records that AWS gives you after creating a hosted zone in Route 53. Always copy-paste from your actual AWS dashboard.
- Save the changes
⏳ It might take 5 minutes to a few hours to reflect.
Part 5: Deploy Your Project with AWS Amplify
Go to AWS Console → Search for “Amplify”
Click on “Get Started” under Host a web app
Connect your GitHub Repository
- Authorize GitHub → Select your repo (e.g., portfolio or blog)
Choose branch (e.g.,
main)Click Next, then Deploy
🔄 Amplify will now:
Build
Deploy
Host your site at a temporary domain like:
main.abcd123.amplifyapp.com
Part 6: Connect Custom Domain (from Hostinger)
In Amplify → Click on your deployed app → Go to “Domain Management”
Click “Add Domain”
- Enter your domain name (e.g.,
cloudkinshuk.dev)
- Enter your domain name (e.g.,
Choose subdomains:
www.cloudkinshuk.devcloudkinshuk.dev
Click Save
Amplify will show you CNAME and A records to be added in Route 53.
Part 7: Add Domain Records in Route 53 →
Go back to Route 53 → Hosted Zones → Select your domain
Click “Create Record”
Choose type A – IPv4 address
Select Alias = Yes → Choose Alias Target = Amplify target (will be shown)
Click Create
For www:
Create a CNAME record
Name =
wwwValue = Amplify's
www.cloudkinshuk.devtarget
Part 8: Enable Redirection from www → non-www
In Amplify > Domain Management
Click on "Edit" for domain settings
Check the box for Redirect www to root domain (
www.cloudkinshuk.dev→cloudkinshuk.dev)
Done!
Now visiting your domain like https://cloudkinshuk.dev will open your Amplify-hosted project.
Pro Tips →
DNS changes may take 5–60 minutes to propagate globally.
Make sure your project has a proper
buildscript inpackage.json(likenext buildorvite build).You can also enable HTTPS (SSL) from Amplify automatically.
Final Thoughts →
Creating this portfolio site helped me improve my React and cloud skills while giving me a central place to showcase my projects and resume. Whether you're a beginner or an experienced dev, building your own portfolio is the best investment in your career.
If you liked this guide or found it helpful, give the repo a ⭐ on GitHub and feel free to connect!
Connect With Me :
My social Links : →
Portfolio: cloudkinshuk
GitHub: kinshukjainn
LinkedIn: kinshukjainn
Instagram: kinshukjain._
twitter(X) : kinshukjainn